





How to Setup Laravel on Ubuntu 20.04 LTS
Developing your application in the local environment. Laravel is a powerful web application framework. In this article, we are going to learn that how to install Laravel Framework with Apache on Ubuntu 20.04LTS.
So, we will complete this task with the help of the steps are given below:
The first step- we need to Install Apache Web Server
The second step- we need to Install and Configure PHP 7.4
The third step- we need to Install Composer PHP Packages Management
The fourth step- we need to Install Laravel 8.x on Ubuntu 20.04
Fifth step-finally we need to Configure
Apache for Laravel and test it. Open up a Terminal and
Do first thing update your package list using.

After that install an apache webserver type

After that press enters key. Then press the Y key to proceed.
You can also set up Laravel with Nginx rather than the apache web server.
For checking apache status type

Now write localhost on the browser and you can see the page.
Now open the terminal to install PHP and required modules for Laravel type.

Press the Y key to proceed.
For checking the PHP version using the command.

Now make some changes in PHP ini file set CGI.fix_pathinfo set to be 0.
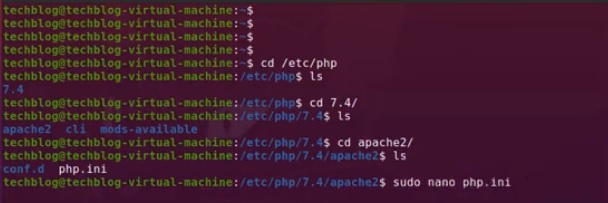
Press ctrl+w and search then uncomment the line and set it to 0.

Press Ctrl + x and then y. Now restart the apache service. Use

Sudo authentication is required to type your password and authenticate.
Now install composer package manager. For this first, we need to install CURL type

Now move the composer using

Check composer version by typing

Now install Laravel Framework using composer type.

As all packages are installed on

Next, we need to add the ‘bin’ directory through the ~/.bashrc configuration using the Nano command.

Use this line at the end of the file

Now reload your bashrc file using the source command.

For creating new Laravel project use.

Laravel is new than your project name to start a new Laravel project. After that Configure Apache and test it. Add your project directory to the www-data group by using the command

Also, you need to change access permission 775 of the storage directory under your project by using the command

Now create an apache vhost Configuration directory and create a vhost config file using Nano file

Editor and paste this.
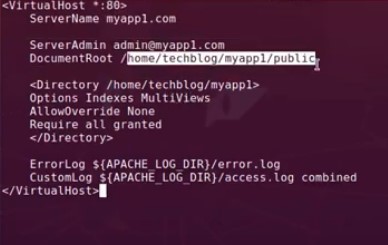
This is the project directory
Now enable mod-rewrite for apache2 by typing

Now enable your site by typing your vhost config file name.

Finally, restart the apache service, Type

As you are in a local environment you need a local DNS resolver for your site. Edit

Add a DNS record first then save the file. Now open the browser and open a tab then type your project hostname and you will see a page something like that
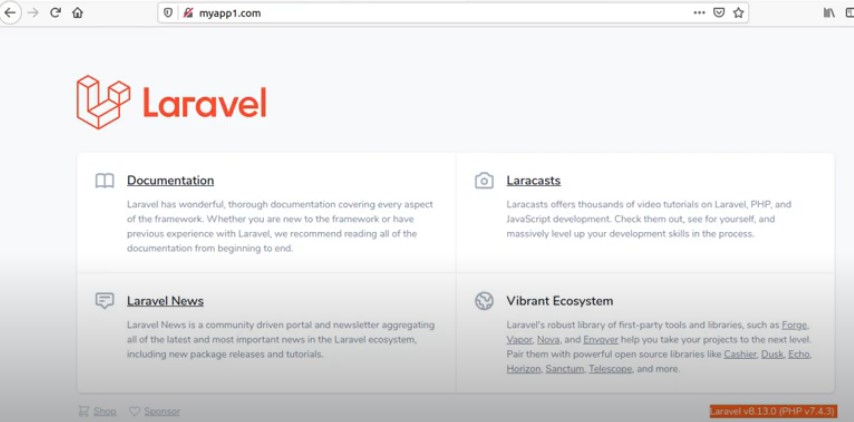
Here you can also see the Laravel version and PHP version.
So, from here open your project directory with any PHP editor you love to use for programming.